How to Create Card File in MYOB Premier
How to Create Card File in MYOB Premier
Another MYOB Premier Command Centre is the Card File. The Card File is the “storage” or the database containing the contacts which may be a company or an individual. There are 4 types of contacts that can be setup in MYOB as follows:
1) Customer
2) Supplier
3) Employee
4) Personal
These are the four types of contacts that need to be created and setup in MYOB to record transactions using Receive Money, Spend Money, Sales and monitoring of corresponding receivables, Purchases and monitoring of related payables, contact management activities like printing of mailing labels, printing of communication letters with contacts like customers, suppliers and other contacts in the Card File.
Now let’s proceed in creating a card:
Click on Card File command centre and the window below appears:
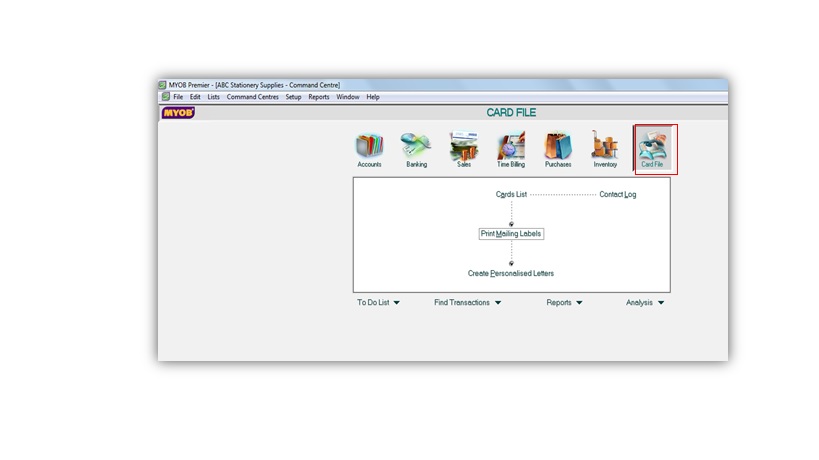
Click on Cards List, and then choose New.
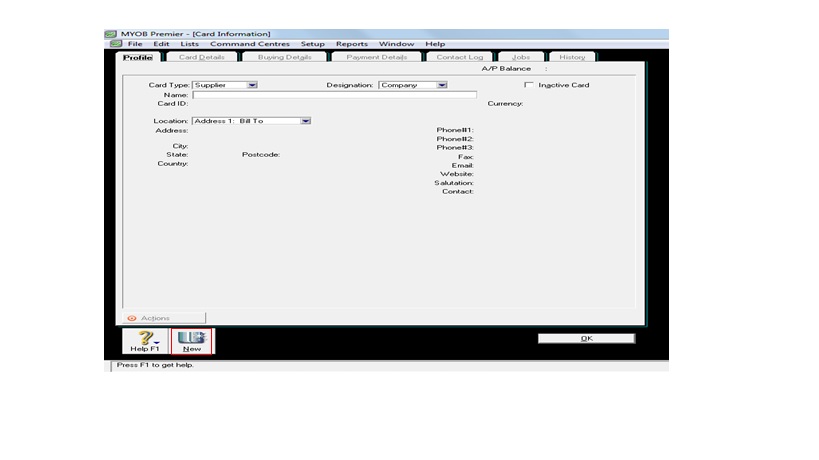
On the Profile tab, fill up the following:
1. Card Type – there are 4 (four) Card Type available in MYOB to choose from and Choose the type of card file you want to create. These are as follows:
1.1. Customer
1.2. Supplier
1.3. Employee
1.4. Personal
2. Designation – choose designation if the Card to be created is a company or an individual. The format for entering Contact Name is already set once you have indicated the Designation which is either a company or an individual.
3. Card ID – for this field, you will enter a code as identifier of the card file to be created. This the equivalent of the Card Code, wherein you assign a code number to a specific supplier, customer, employee or personal Contact ID Type. However, for Personal contact, no need for you to enter Card ID detail or provide additional information. For example, you want to assign Card ID for customers starting with C0001 or C1, or suppliers assigned with Card ID S0001 or S1 and so on.
4. Currency – currency to be used should be indicated in this field.
5. Location – of course, this is the Location of the contact, for which 5 Addresses can be indicated especially if the contact have more than one business address to be set up as follows:
5.1. Address 1 – or “Bill To” address. This is the address for which billings are to be indicated for Customer cards.
5.2. Address 2 – or “Ship To” address. This is address field which is applicable if delivery address is different from that to which the billings that would be sent.
5.3. Address 3
5.4. Address 4
5.5. Address 5
6. Contact Phone Numbers – up to four contact numbers can be indicated at MYOB including the Fax Number.
7. Email
8. Website
9. Salutation
10. Contact
After you fill up all of the required fields in the Profile tab, now go to Card Details tab, and the following screen appears:
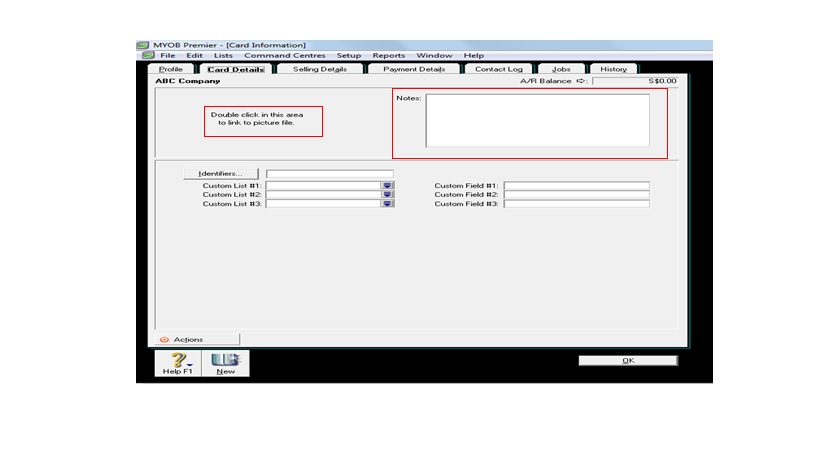 In the Card Details tab, you can do the following:
- Insert picture for the Card, be it individual or company;
- Put Notes regarding the individual card or company card;
- Assign identifiers for the card – code for assigning Identifiers in MYOB is only a one-letter word. For example, you would like to group your suppliers into service-related and goods-related suppliers.
- Assign Customs Lists attribute or characteristic for the card being created.
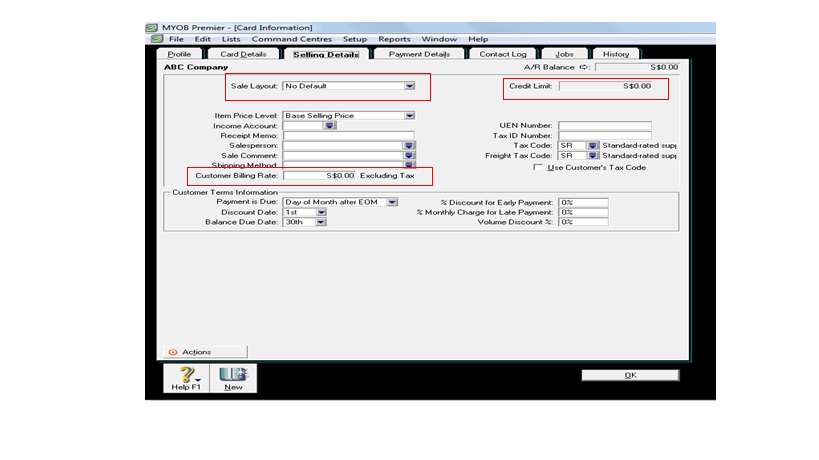
If you are creating a Card file for a Customer, next you have to go to the Selling Details. The screen shown below appears:
Please take note that the above fields provides Selling information, Credit terms, Credit Limit and Tax Information.
Now, go to the Payment Details tab and indicate the mode or method of payment the customer pay account due to you. The following screen appears when clicking on the Payment Details tab:
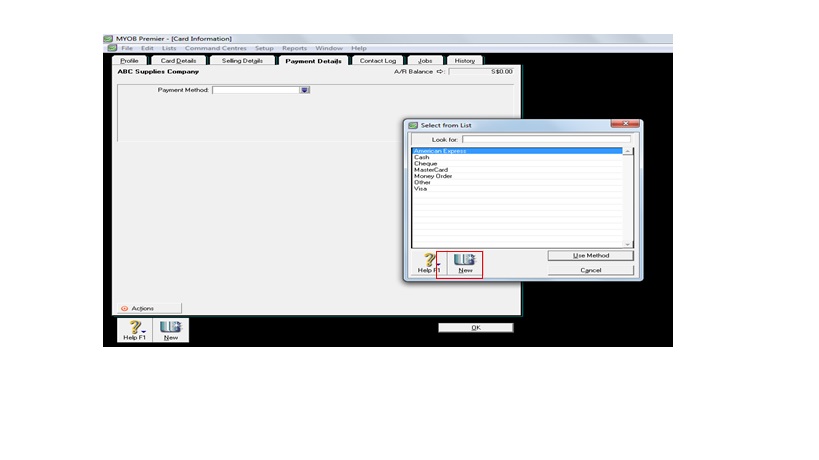
If customer’s mode of payment is not included in the listing provided by MYOB, you just click the field New to create a new payment method.
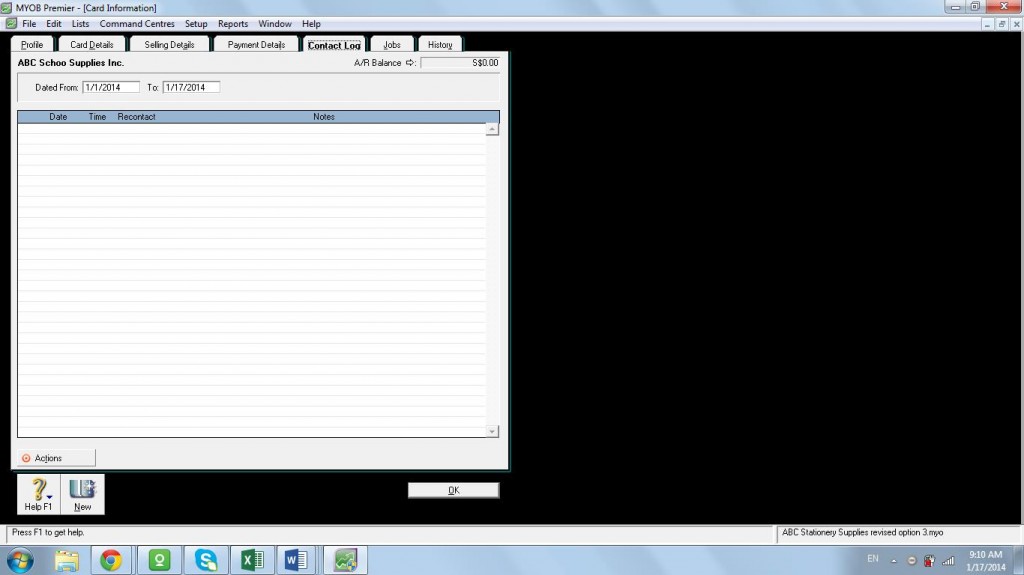
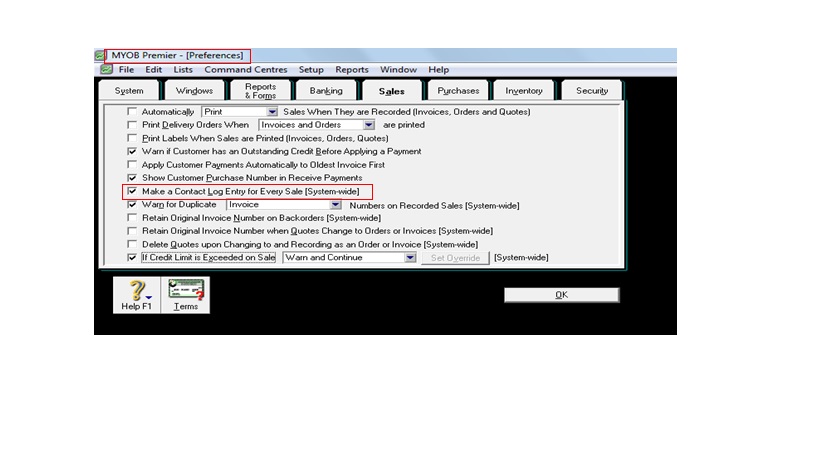
Now, proceed to the History Log tab. Take note that this tab logs sales or purchasing logs and should be setup in the Easy Setup Assistant – Preferences. Setting up of Preferences is discussed on the next topic. A screenshot of the History Log appears below:
Below is a screenshot of Preferences setup for Sales tab in the Easy Setup Assistant so that Contact Log would appear in the Card File tab.
Now, we go to the Jobs tab.
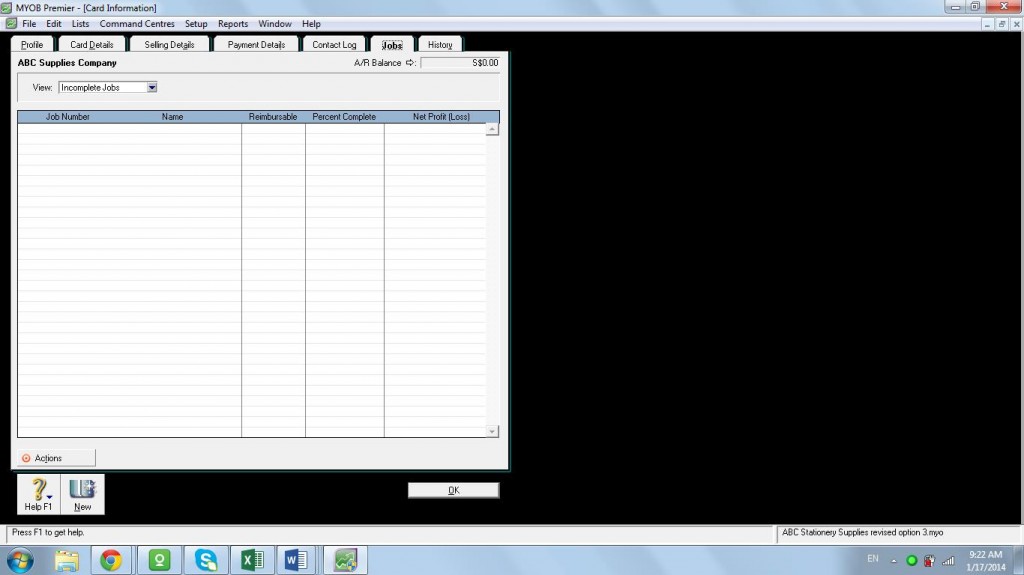
The Job tab shows the jobs for the customer as well as status for completed or incomplete jobs.
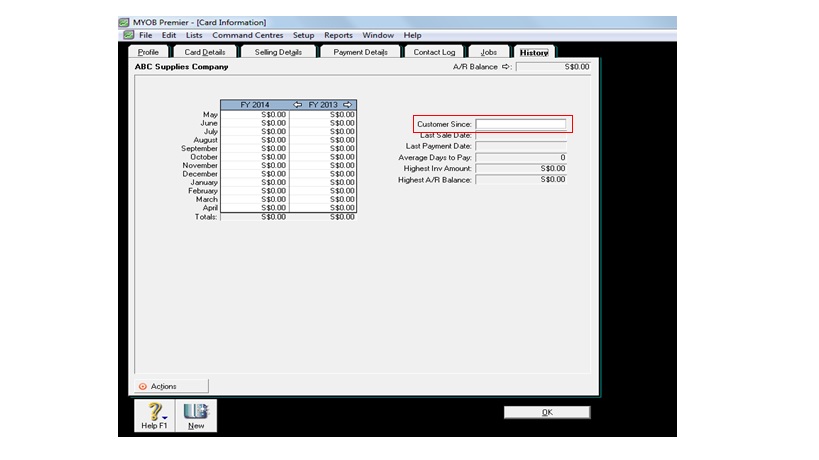
Now, go to History tab. This is the tab showing the history of transactions for the specific customer or supplier. If this customer have been a customer before the conversion period, you can indicate the date since when the contact have been a customer, or you can indicate the last sales date, last payment date, average days to pay.
