How to Setup Items in MYOB Premier
Setting up Items in MYOB Premier
MYOB Premier enables user to set up Inventory Command Centre. In MYOB, you can set up physical unit of items which the company buy, sell and keep for inventory. Services like delivery, handling, packing charge, crating charges can also be included as items as part of the items for sale or purchase.
You have to set up Items in MYOB Premier before you can start to record Sales, Purchases and Inventory transactions. Aside from setting up the inventory amount in the account opening balances, you also have to create quantity on hand and the amount values for the items.
Now, let’s proceed to creating an item in MYOB Premier:
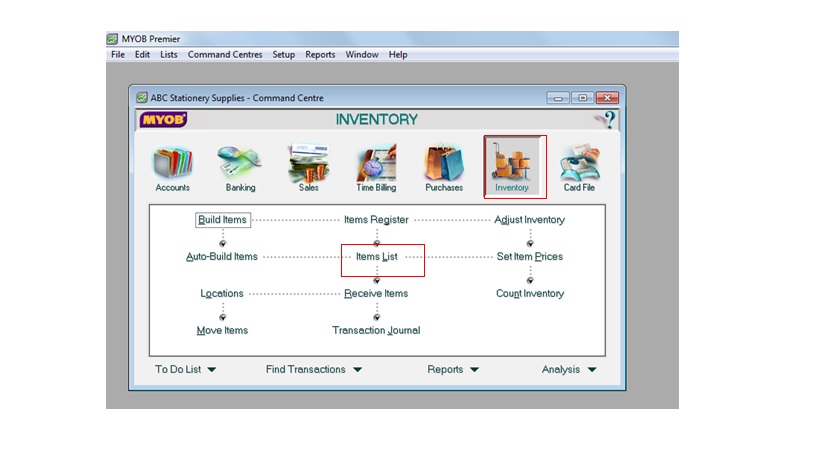
- Go to Inventory Command Centre, and click on Items List. The following screen appears:
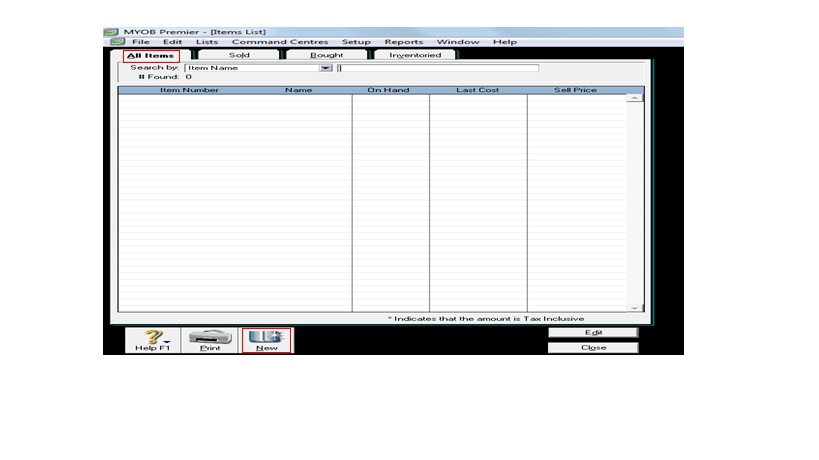
2. On clicking Item List, and click on New:
3. On the Profile tab, the following screen appear after clicking on New:
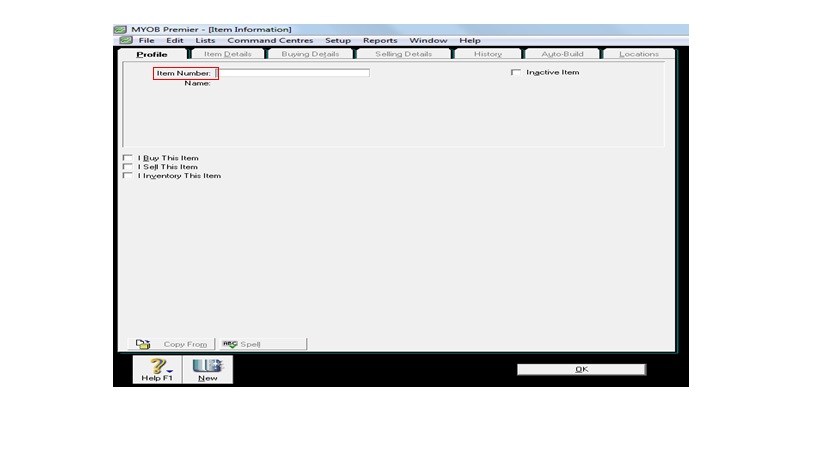
On the screen appropriate field you should indicate the following:
3.1. Item Number – you should use systematic item number that will allow you to properly sequence together with other items for creation if you are dealing with numerous items to create.
3.2. Item Name – choose the most descriptive name for the item you are going to setup.
Please see screenshot that appear when you click on the 3 fields below:
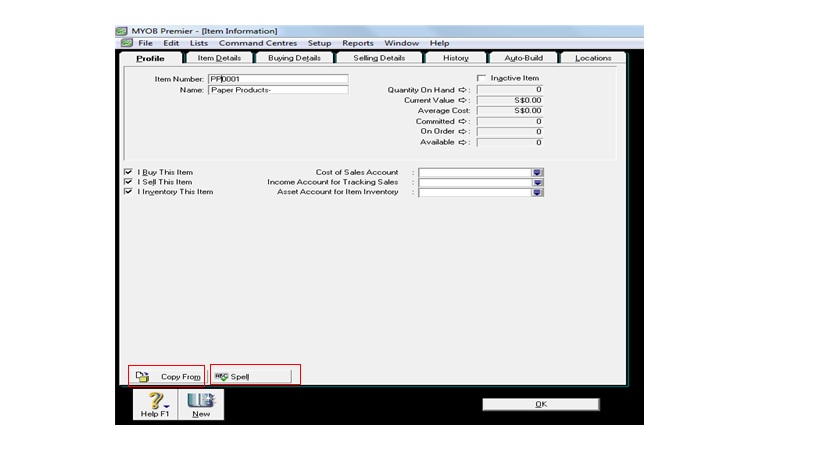
3.3. I Buy This Item – select this option when this represent item you buy. Please take note this field has direct link to Cost of Sales account. You have to indicate the correct Cost of Sales account when you link this to the field. If you are using this field for items you do not sell, like office supplies or store supplies, you link this to correct expense account, like Office Supplies or Store Supplies
3.4. I Sell This Item – select this field when this represent item you sell. When you click on this field, this is linked to Income Account for Tracking Sales. Indicate the correct link to the corresponding sales account for this field to properly map income account.
3.5. I Inventory This Item – select this field when this represent item that you keep inventory and want to monitor and track inventory movements as well as inventory quantities and amounts. For this field, you have to indicate the Asset Account for Item Inventory.
Please note that there is an option for Copy From button that allow you to copy another item information to the active item being created. Item number, item name, supplier name, auto-build information as well as history information are not included in the information being copy so you have to indicate these on the active item number being created. And another option is the Spell Check that allow you to check spelling for the active window.
For items 3.3, 3.4 and 3.5 above, you have to choose any one, any two or all of the 3 item classification as follows:
For buy and sell or trading business transactions:
I Buy This Item – click on this option when you buy this item but don’t sell or track values or quantities of inventory. Examples are office supplies and store supplies which you don’t sell or track inventory values.
I Buy This Item, I Sell This Item – click on these two fields when you buy this item and sell this item but don’t track or monitor for inventory purposes.
I Buy This Item, I Sell This Item, I Inventory This Item – click on these three fields when you buy, sell and monitor the item for inventory quantities and values.
I Sell This Item – click on this field when you want to include items or services as part of a sales in the sales invoice you are going to issue.
For manufacturing type of business:
I Sell This Item, I Inventory This Item – use these options when you sell finished goods that you produce or manufacture and do tracking of inventory quantities and values.
I Buy This Item, I Inventory This Item – use these options when you buy materials for use in manufacturing, and track quantities and values for inventory purposes.
I Inventory This Item – this includes other goods or materials that are included in the production or manufacturing process for finished goods.
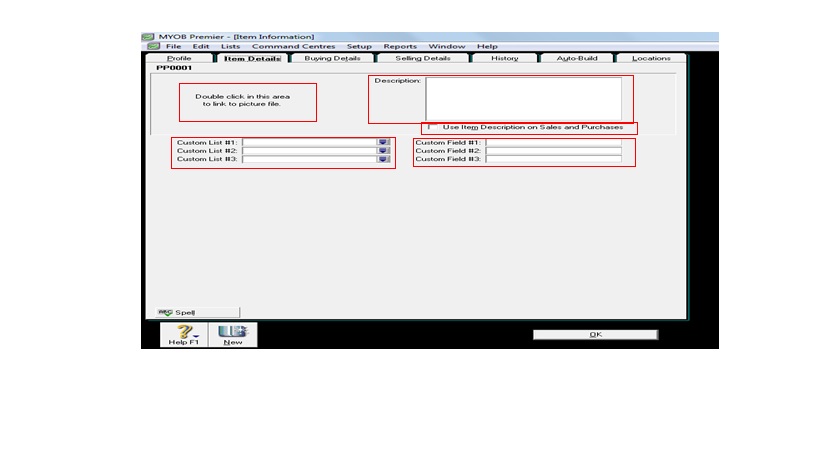
Now, click on the Item Details on the next tab – and in this field, you can put picture for the item as well as Description for the item to be used in Purchases and Sales transaction. Custom Lists can also be indicated on this tab.
5. Now go to the Buying Details tab and you have to fill in the information as stated and the following screen appears:
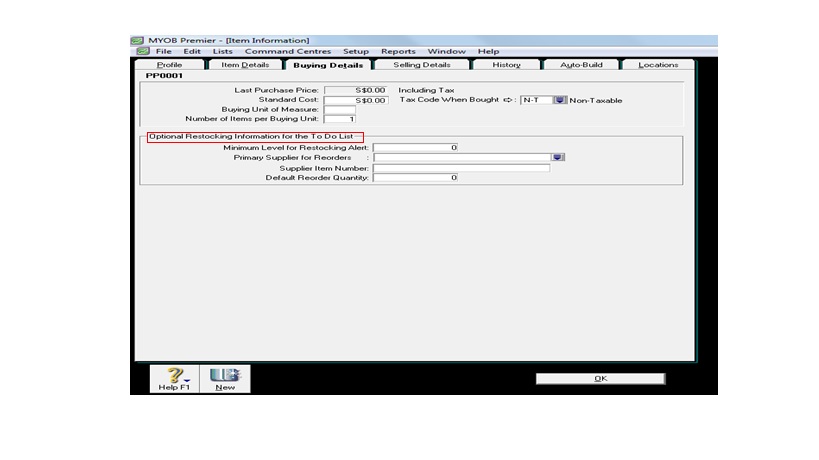
5.1. Last Purchase Price – indicate the last purchase price including tax on this field.
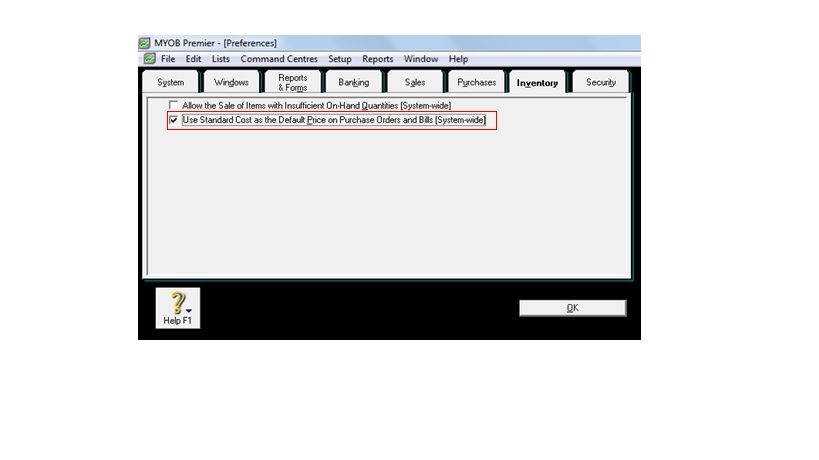
5.2. Standard Cost and Tax Code When Bought– indicate tax code when bought. It is optional to indicate standard cost and should be setup in Preferences – Inventory Tab to “Use Standard Cost as the Default Price on Purchase Orders and Bills (System – Wide) as shown:
5.3. Buying Unit of Measure – this is the unit of measure when you are going to buy the item. For example, you purchase school supplies for sale like notebooks on a per box basis and each box contain 36 unit pieces per box. You indicate Box as unit of measure.
5.4. Number of Items per Buying Unit – this is the number of units for each buying item. Per example above, the number of items per buying unit is 36. Thus, when you enter purchase of 3 boxes, 108 units of notebooks is added to the inventory quantity.
5.5. Optional Restocking Information for the To Do List – this is optional but play an important reminder when indicated to flag for warning on To Do List as follows.
5.5.1. Minimum Level for Restocking Alert – on this option, you can set up the minimum stock level inventory for which MYOB Premier will flag or remind through To Do List for items that need restocking alerts so that reorders can be made.
5.5.2. Primary Supplier for Reorders – on this field you indicate the primary supplier for reorder. This option is linked to card file for supplier so all you have to do is click on the box to choose from among the list.
5.5.3. Supplier Item Number – you indicate the supplier item number on this field.
5.5.4. Default Reorder Quantity – you can also setup default reorder quantity in this field.
6. Now go to the Selling Details tab if you Sell the inventory item. If you don’t sell this item, of course, you don’t fill in the fields on this tab. Screen below appears:
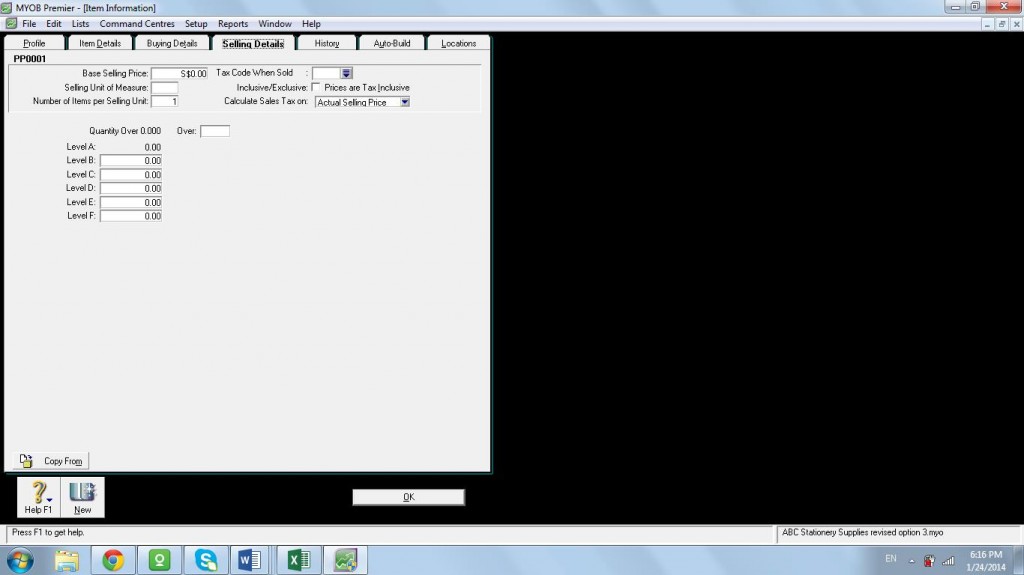
Please take note of the following with regards to Selling Details tab:
6.1. Base Selling Price – this is the selling or retail price for each item selling unit.
6.2. Tax Code when Sold – this is the tax code to be used when sold and preparing the sales invoice. However, you can do override for any change in tax code to be used upon invoicing.
6.3. Inclusive/Exclusive – you have to indicate if the prices are tax inclusive or not.
6.4. Selling Unit of Measure – this is the field you are going to indicate if item is sold by “piece”, “pack”, “dozen” and you can use up to five characters
6.5. Number of Items per Selling Unit – indicate in this field the number of units per selling unit of measure. For example, you indicate “pack” and there are 6 units for every pack, you indicate 6 so that when a sales invoice is issued for the sales, inventory quantity will be deducted with 6 units.
6.6. Calculate Sales Tax On – indicate in this field if the sales tax would be based on Actual Selling Price.
6.7 Price Levels – only the Premier version of MYOB is capable of price level that allow you to assign different price level to customers.
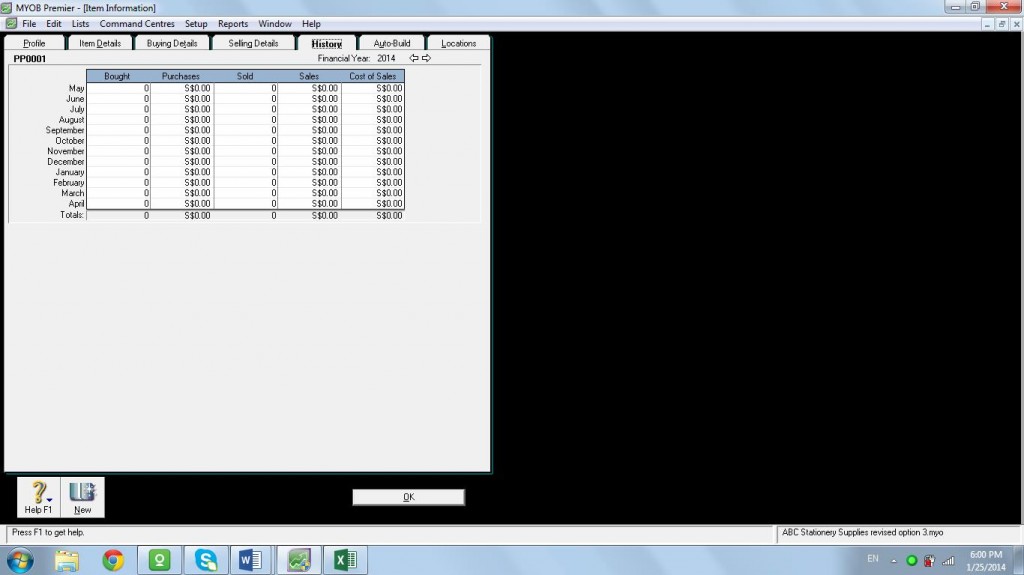
7. Now you go to History tab and in this tab, you see the history for the item details for the item. Over time, when you enter transactions for the item, details as to buying, selling, sales and cost of sales history on a per month basis starting on conversion month for a one-year period. Screen below appears:
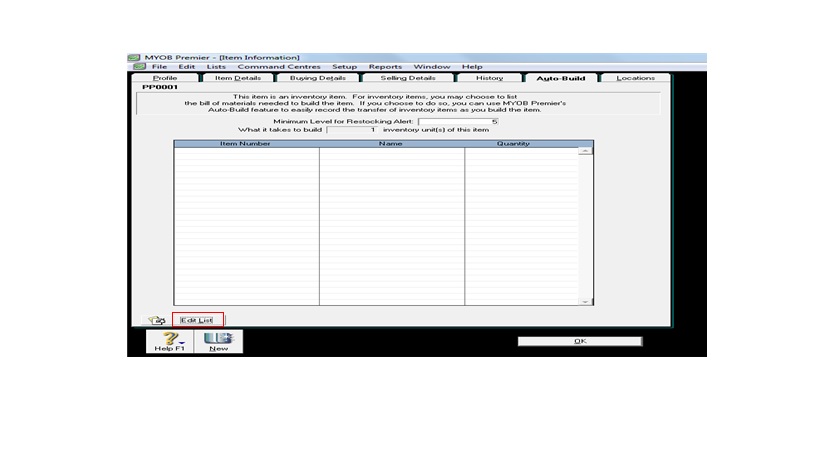
8. After History tab, click next to Auto-Build tab. If you buy the item and then sell in its original condition, without having to use other items in the inventory, you don’t need to Auto-Build the item. However, if you need to further process the item as well as use other inventory items before you can sell this item, then you have to use Auto-Build. The following screen appears:
 Now, click on Edit List and screen for auto-building items appear:
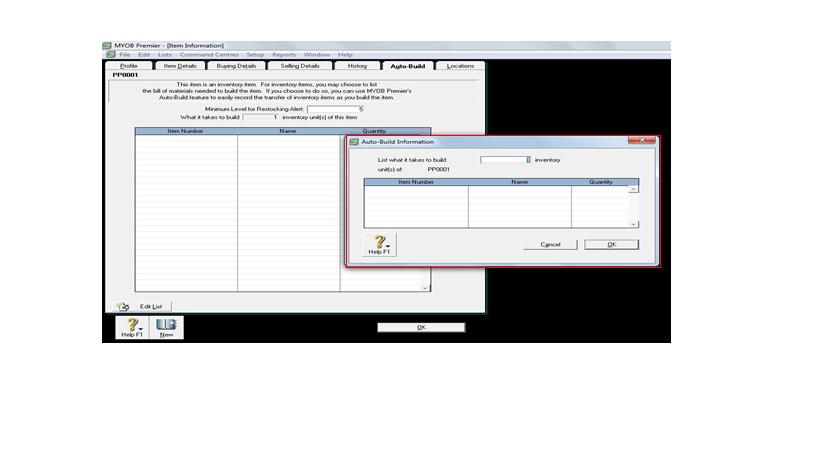
Now, you indicate the other items that are being used in order to manufacture or process this product into a saleable item unit.
9. Now you go to the Locations tab and indicate the location of the item in the Default Ship/Sell/Auto-Build from Location and Default Receive/Auto-Build Into Location. Creation of Single or Multiple Inventory Locations discussed in detail in Part 12 How to Multiple Inventory Locations and Moving Items Between Locations.