Paying Bills in MYOB Premier
In paying your supplier bills for inventory items purchases (those that you have inventoried for tracking purposes), you can use the following options to pay your supplier bills as follows:
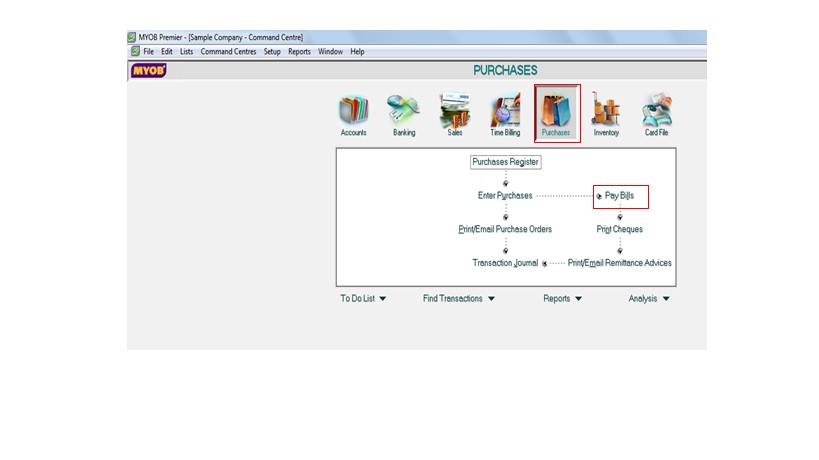
1) Pay Bills option under the Purchases main command centre to make the payment. Once your supplier have billed you and you have accordingly entered the bill in the Purchase status, MYOB require you to use the Pay Bills option if you have recorded a bill. This feature enables you to apply payments to one or more outstanding bills.
2) Bank Register option to pay one or more of your supplier’s bills. However, you cannot record detailed information on this window for each payment you are going to make. Take note that entire payment is automatically matched and allocated against the earliest due bill when you use the Bank Register window to make supplier payments.
3) To Do List window also allow you to pay one or more outstanding bills with just one click.
Paying Supplier Bills using Pay Bills Window:
Go to the Purchases main command centre and choose Pay Bills. Screenshot appear below:
After clicking on the Pay Bills feature, the following screen appears before you have indicated the Supplier
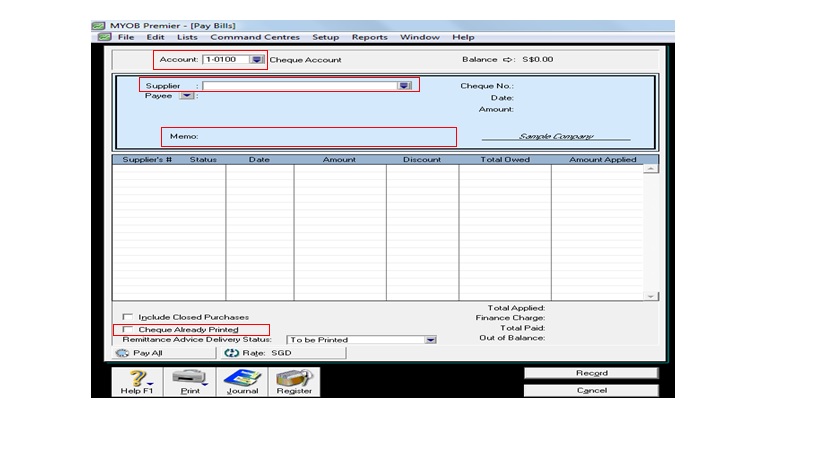
Once you have clicked on the Pay Bills feature, you have the option to change the memo, payment date and other fields as you may find necessary. In the scroll list, you can find which bill or bills you want to apply the payment and select on the applicable bill/bills. For the Amount Applied column, you indicate the amount of payment applied. Take note that when you are entering Pay Bills to record cheque payment and the check is already written and issued, you have to choose the Cheque Already Printed option which is located in the lower left hand corner of the Pay Bills window.
Paying Supplier Bills by using Bank Register Window
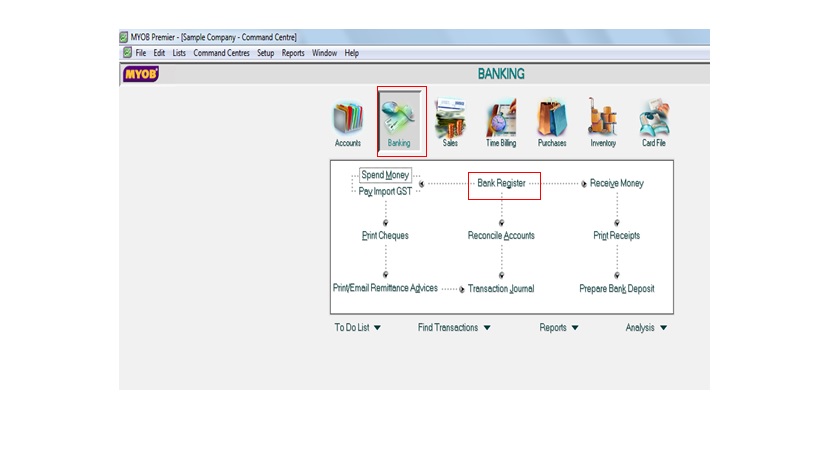
To pay one or more supplier bills using the Bank Register window, click on Banking main command centre and click on Bank Register. Screenshot for the window appear below:
Take note that in the Bank Register window the pay bill option is found in the lower left hand portion in the Type field. Screenshot of the window below shown for your reference:
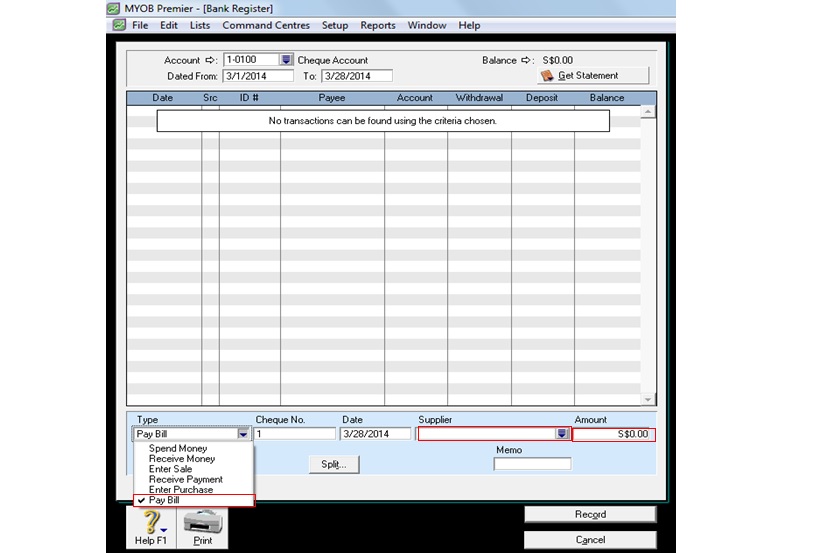
Choose the correct Type = Pay Bill. Then indicate the name of the Supplier. Once you indicate the supplier’s name in the drop-down arrow, the Outstanding A/P Balance amount automatically appear and select the applicable bills due to the supplier. If you are going to pay the amount as indicated in the Outstanding A/P Balance, indicate the amount of payment in the Amount field and fill in the other necessary information in its corresponding fields as follows:
Cheque No. – in case you have not activated automatic sequence of the cheque number or you are using another cheque number series, you need to manually indicate in this field.
Date – the date payment is made and this will also be the cheque date that will appear in the printing of the cheque.
Memo – if you are going to choose Type as Pay Bills, the memo field appear as “Payment; Supplier Name” otherwise, you have to change this field to suit the information you want to indicate other information you want to indicate.
Click on Record to save the Pay Bill transaction you have entered.
This pay bill transaction will now appear in the Bank Register window’s upper portion as per screenshot below:
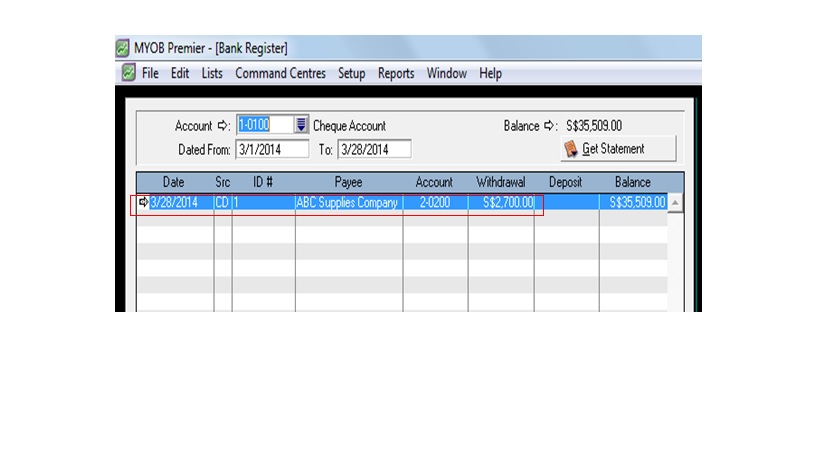
When you click on the white or grey zoom arrow beside the transaction, you are directed to the Payment details as follows:
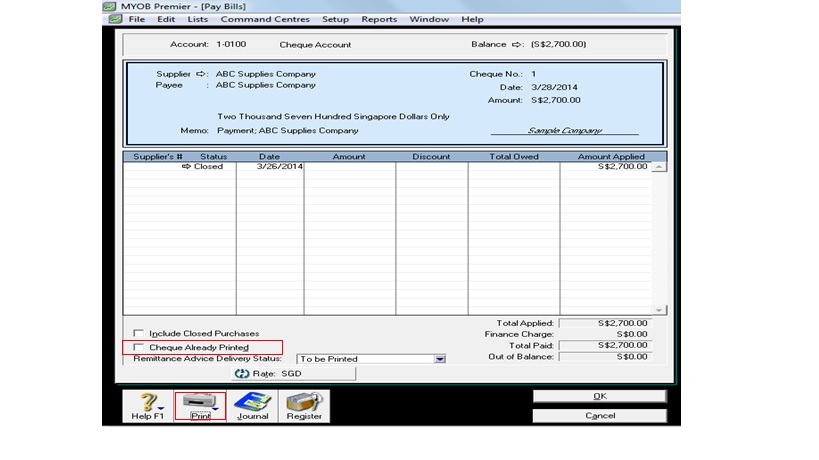
To print the cheque, click on the Print option on the bottom left portion of the Pay Bills window and choose the option that you want to print based on the available forms and format you want the cheque printed as taken up in the topic “Forms in MYOB Premier”.
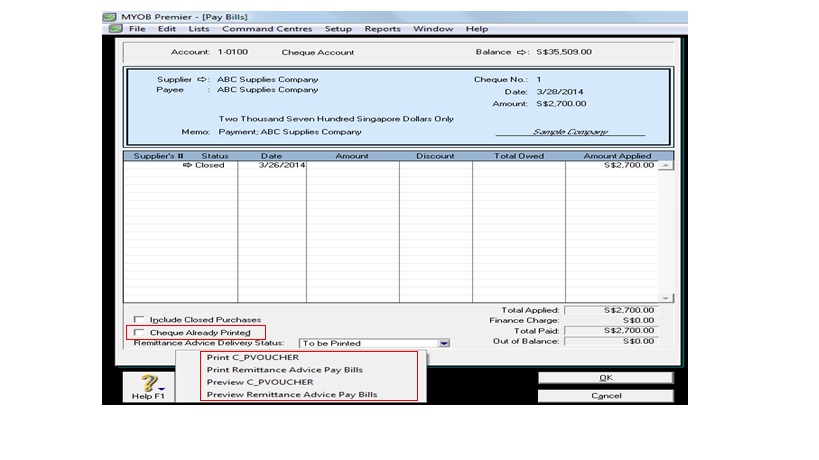
If you already have made and written the cheque to your supplier either manually or its done by your bank through check issuance arrangements and other options that don’t require you to print the cheques you have drawn and written and you are entering the Pay Bills transaction just to record it in MYOB, you have to indicate in the above window that “Cheque Already Printed”.
If you want to print remittance advice, click on Print Remittance Advice Pay Bills. If you want to print the remittance advice in batch, you have to indicate in the field
Paying Multiple Bills using To Do List
MYOB allows you flexibility and powerful time-saving tool by allowing you to pay more than one bill at the same time for the same supplier in the To Do List window.
To do this, go to the To Do List which you can locate in the lower portion on any main command centre and then click on A/P option as per screenshot below:
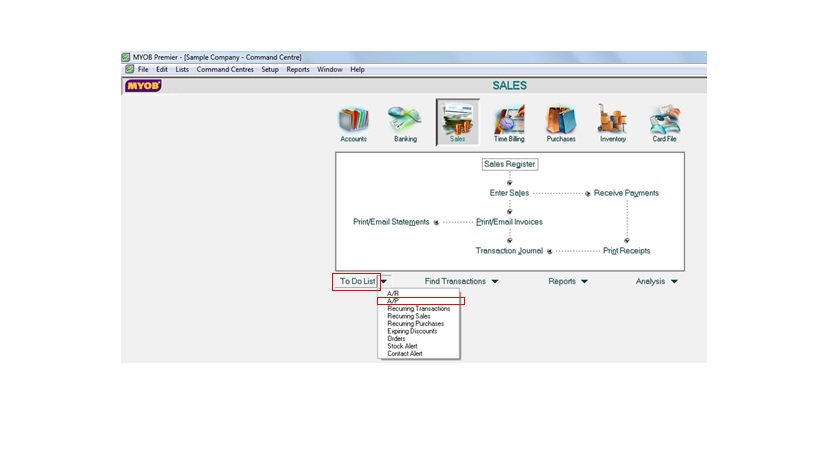
After clicking on A/P tab, details of the Outstanding Bills for the supplier will appear on the screen. To apply the amount you are going to pay against the Bill, you click on the right-hand portion beside the Balance Due to indicate checkmark as per screenshot below:
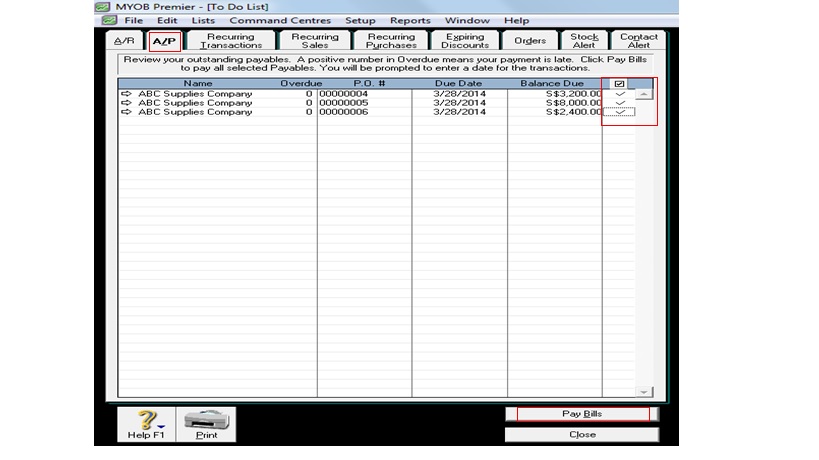
After indicating the bills you want pay, click on Pay Bills. The next screen will prompt you to confirm the date of the transaction as per screenshot below:
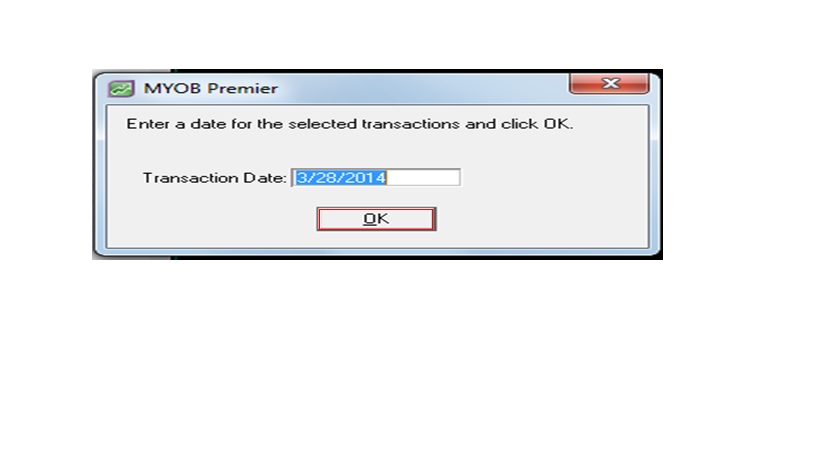
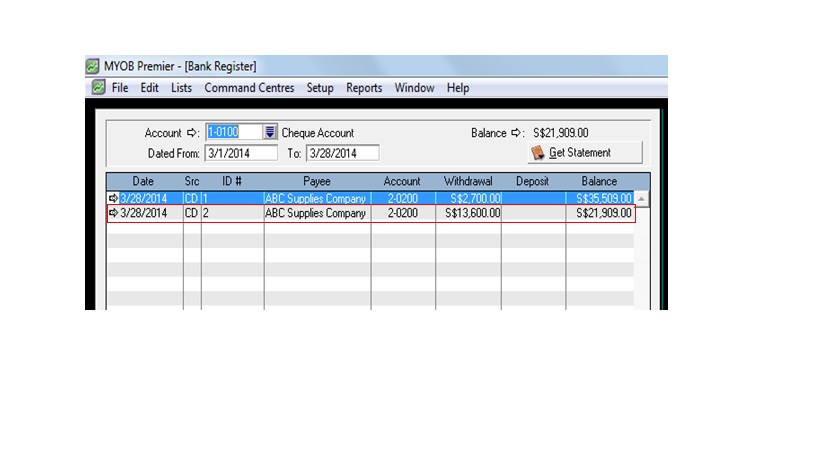
Click on OK to proceed or you may change the date to indicate the correct date then click OK. The pay bills transaction is now recorded under one journal entry and you can view the transaction in the Bank Register window as follows:
Now, you are able to know how enter multiple supplier bills with just a click away with MYOB Premier.
