Using Category in MYOB
Need to generate related reports on how a specific department in your company incur operating costs and how much revenue are generated from them? It would be so easy with MYOB. This sophisticated software allows you to assign and accordingly identify related cost and or revenue for a specific department or cost center or profit center. As defined, a cost center is a specific department within an organization which incur cost but do not generate revenues. Example of cost centers include the back office departments like accounting and finance department, marketing department and others.
On the other hand, a profit center is different from a cost center in the sense that it can have its own revenue generation as well as related costs. In summary, a profit center can be accounted as if a separate and distinct entity within an organization for the basis of profit calculation and or profit contribution to the company organization.
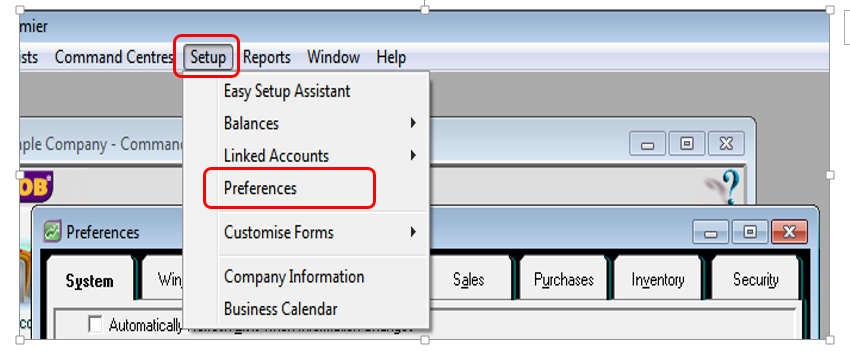
In order to be able to setup Category in MYOB, you have to indicate this in the Setup – Preferences. To activate this option, go to Setup and then choose Preferences as per screenshot below:
In the Preferences screen, activate the requirement to assign categories in all MYOB transactions by clicking on the box:
“Turn on Category Tracking: Categories are Required on All Transactions [System-Wide]”
See screenshot below: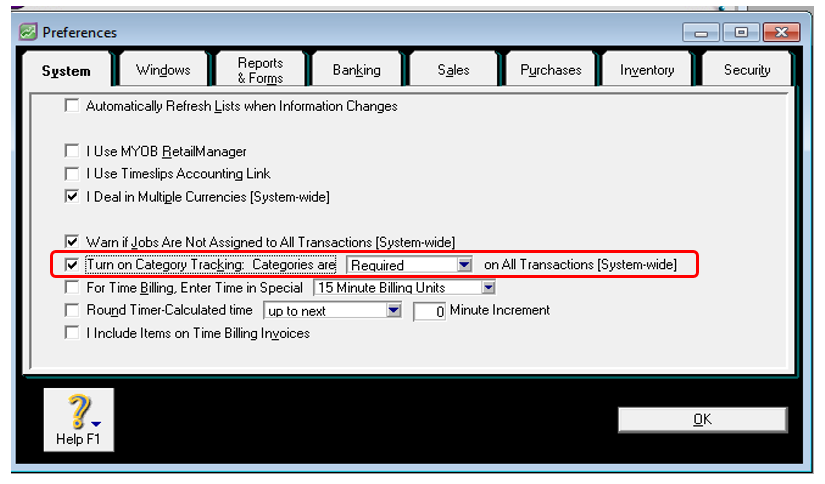
Click on OK to save the Preferences setup.
You must take note that to be able to make use of this MYOB feature, you have to indicate the correct category for every expense transaction, like recording related expenses as well as Sales or revenue recording in MYOB. If you fail to record the related cost or profit center to the correct category, this will have the effect of understatement or overstatement of related costs or revenues.
Use of Categories is different with that of Jobs because Categories is used to monitor and report in almost all transactions including sales, income and expenses.
Creating Categories in MYOB
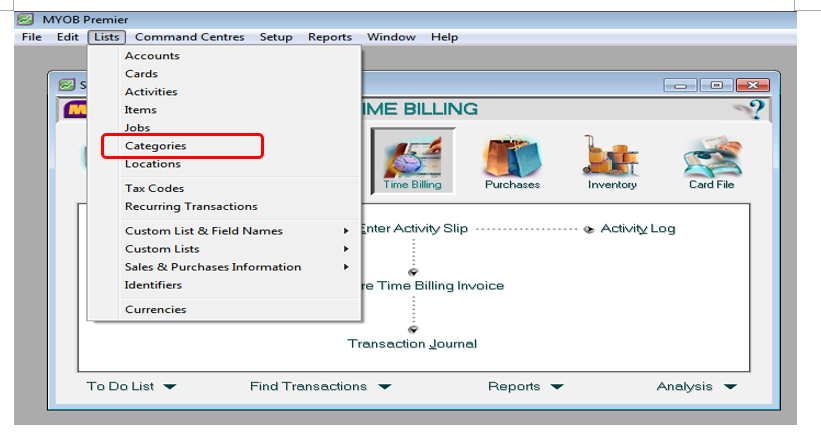
You can create Categories in MYOB by going to the Lists menu and choose Categories as per screenshot below:
In the Categories List window, you can create the new Categories by clicking on New as per screenshot below: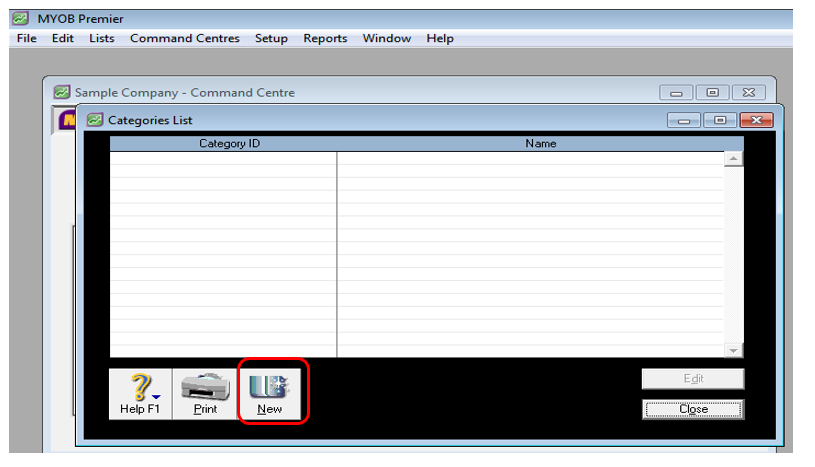
In the sample category creation, Category ID used is Dept. 01 and the Category Name is the Sales Department:
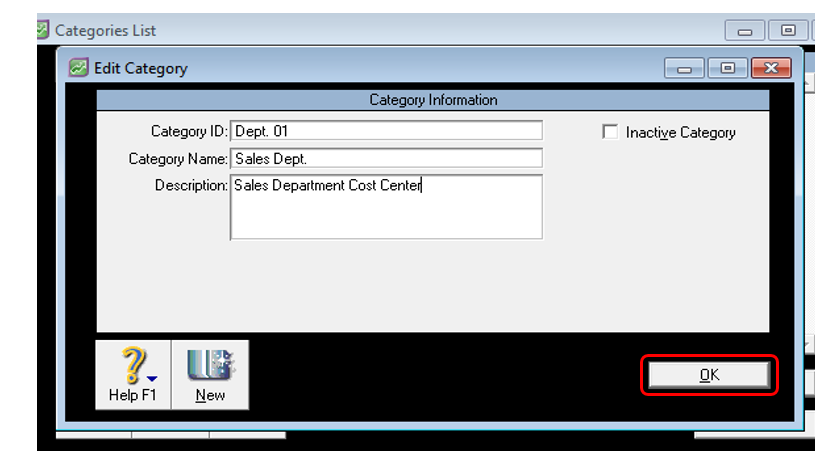
Click on OK to save the newly added category.
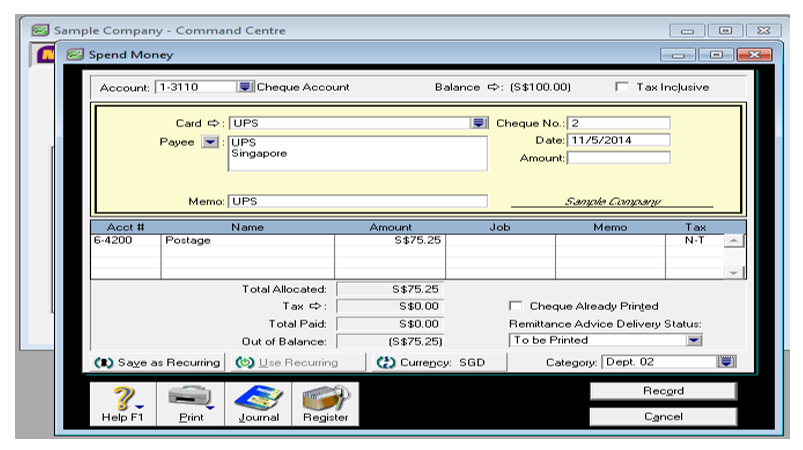
You can also add a new category while in the middle of entering transaction. Take for instance you are making Spend Money entry to record payment of postage fees chargeable to another cost center Finance Department. In this case, you have to create another category for Finance Department by clicking on the Category field in the Spend Money window as per screenshot below:
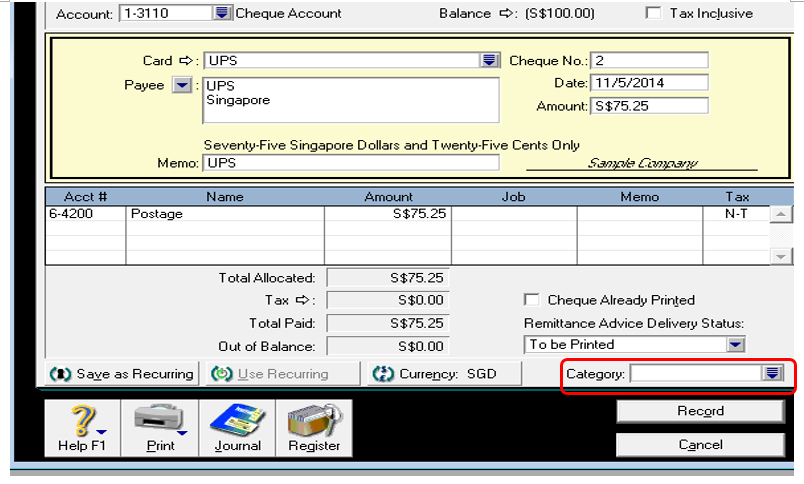
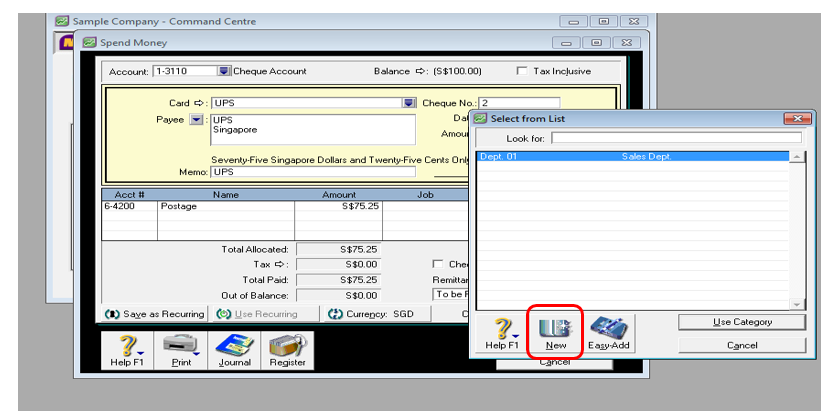
The Category screen appear and choose New
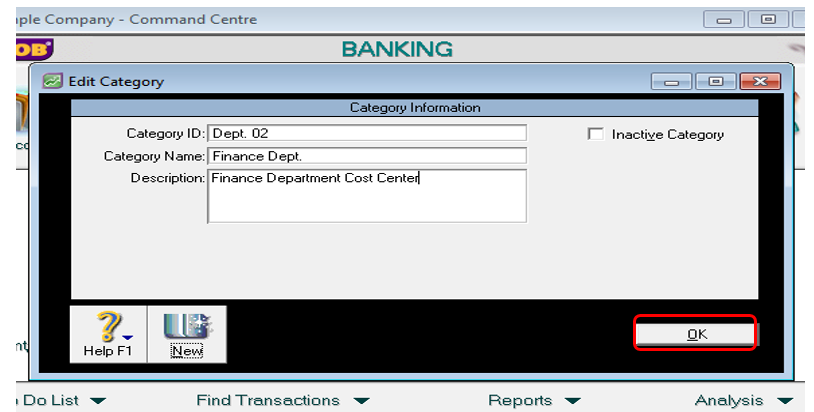
The new category screen appears and in this screen you have to create the new category. As an illustration, you can as per screenshot below to create Dept. 02 with category name Finance Dept.:
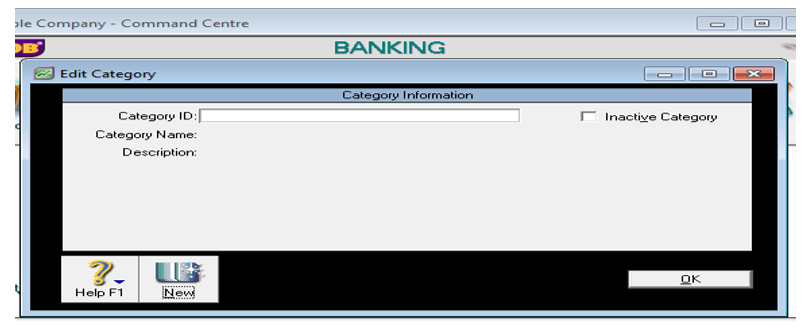
The screenshot below shows the new category being added. Click on OK to save the new category.
After you have click on OK, you are now directed back to the Spend Money screen and you now can indicate the new category you have created in the Category field and click on OK to save the Spend Money transaction.
Generating Category Reports
You can view available reports for Categories by going to the Reports option and choose Accounts. This report enable you to generate numerous reports as follows:
- Activity Summary
- Activity Detail
- Category Transactions
- Profit and Loss
- Balance Sheet
- General Ledger Summary
- General Ledger Detail
- History
- Categories List
